

Google BigQuery
Google BigQuery is an industry-leading, fully-managed cloud data warehouse that allows you to store and analyze petabytes of data in no time.
This guide will help you configure BigQuery as a source from which you can route event data to your desired destinations through RudderStack.
Granting permissions
Follow these steps below to grant the necessary permissions for Warehouse Actions. For BigQuery, use the BigQuery Console.
Creating the role and adding required permissions
- Go to https://console.cloud.google.com/iam-admin/roles and click on CREATE ROLE.
- Then, fill in the details as shown:

- Next, click on ADD PERMISSIONS and add the permissions as listed in the following image:

The permissions are as shown below:
bigquery.datasets.getbigquery.jobs.createbigquery.jobs.listbigquery.tables.createbigquery.tables.getbigquery.tables.getDatabigquery.tables.listbigquery.tables.updatebigquery.tables.updateData- After adding all the required permissions, click on CREATE.
Creating the service account & attaching the role to it
- Next, go to https://console.cloud.google.com/iam-admin/serviceaccounts.
- Select the project which has the dataset or the table that you want to use.
- Click on CREATE SERVICE ACCOUNT.
- Fill in the details in Step 1 as shown below, and click CREATE AND CONTINUE:

Note down the Service account ID. This ID is required while creating the RudderStack schema and granting the required permissions to it.
- Then, fill in the details in Step 2 as shown below, and click CONTINUE:

- After completing steps 1 and 2, click on DONE. This will move you to the list of service accounts.
Creating and downloading the JSON key
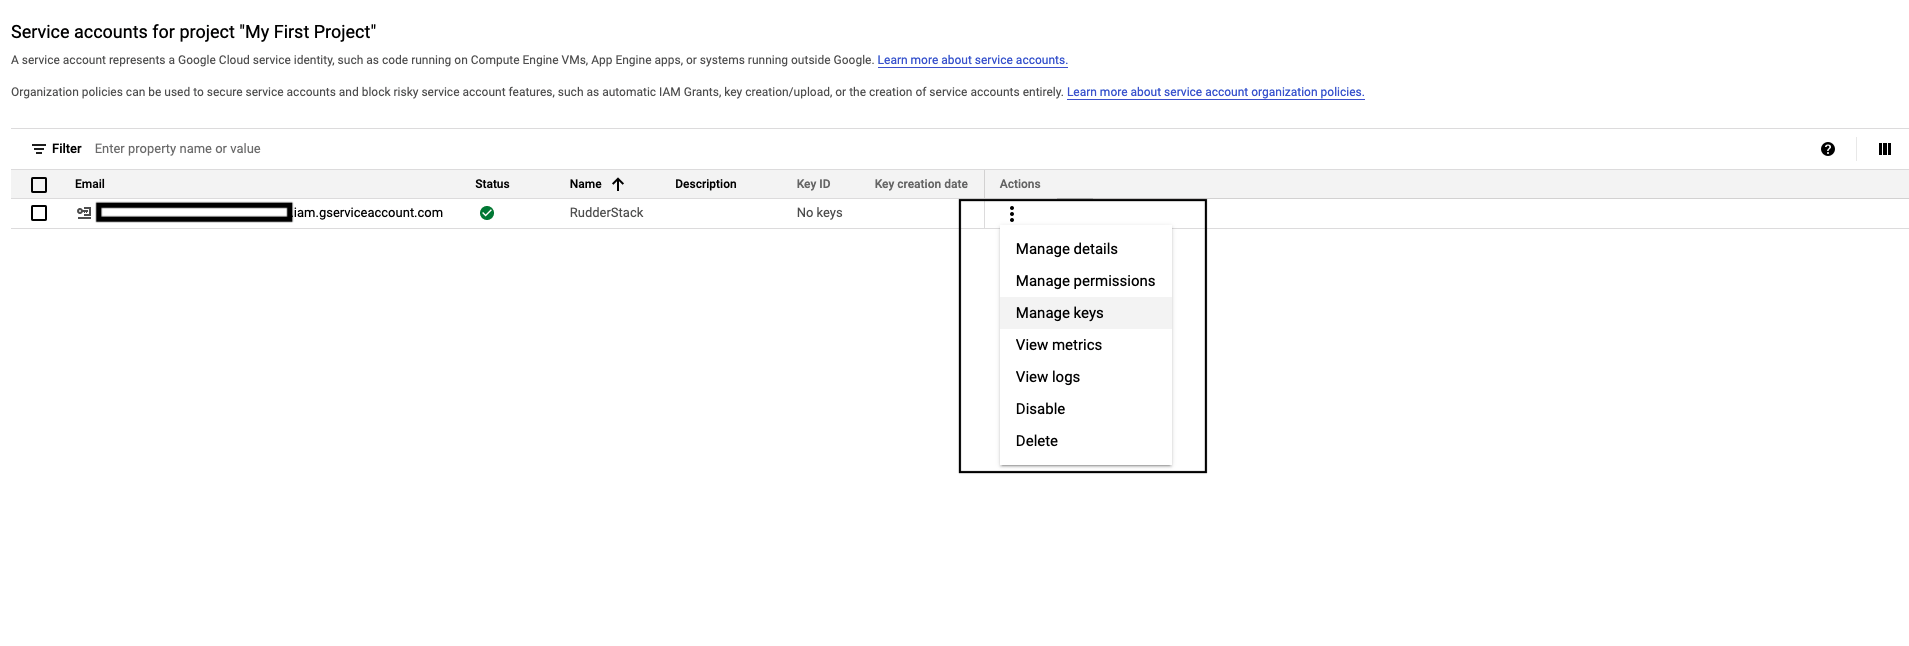
- Now, click on the three dots under Actions in the service account that you just created and select Manage keys, as shown:
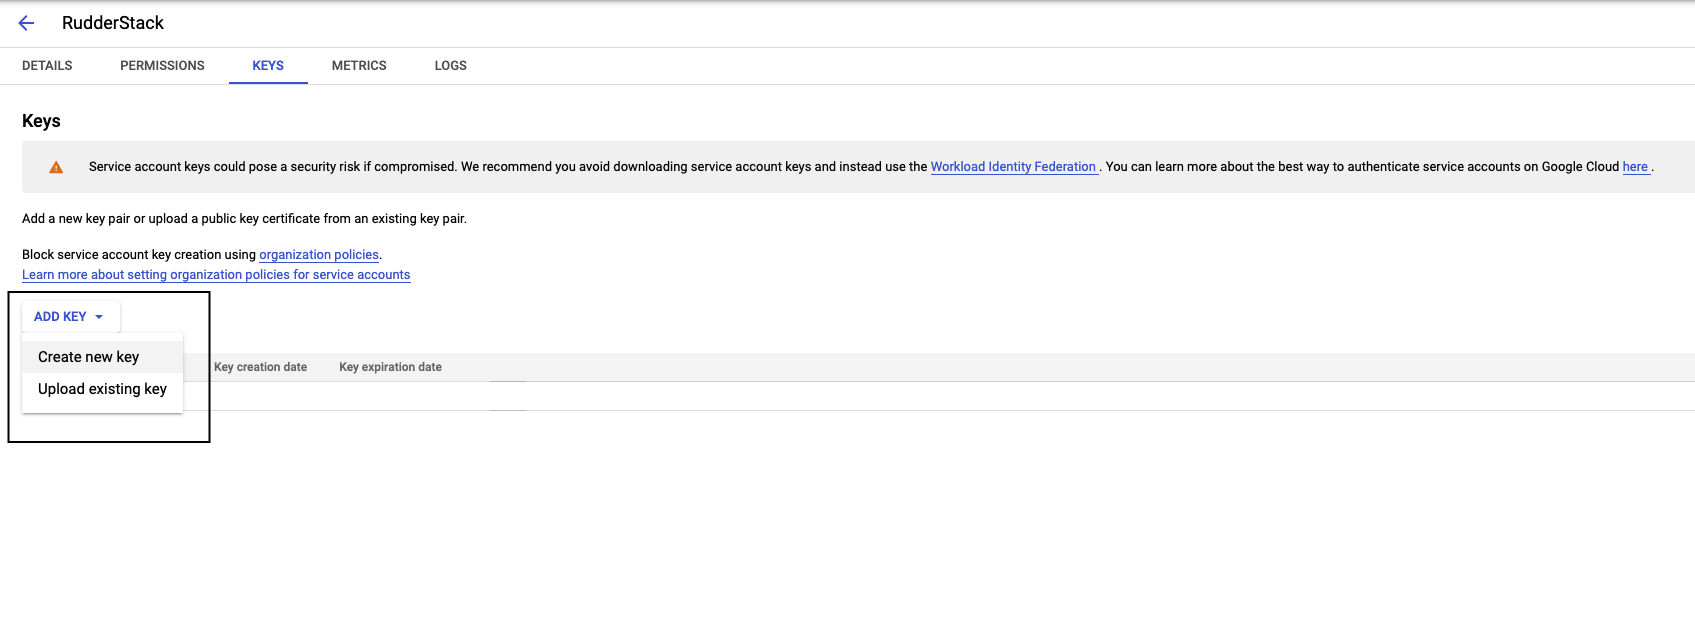
- Click on ADD KEY, followed by Create new key, as shown:
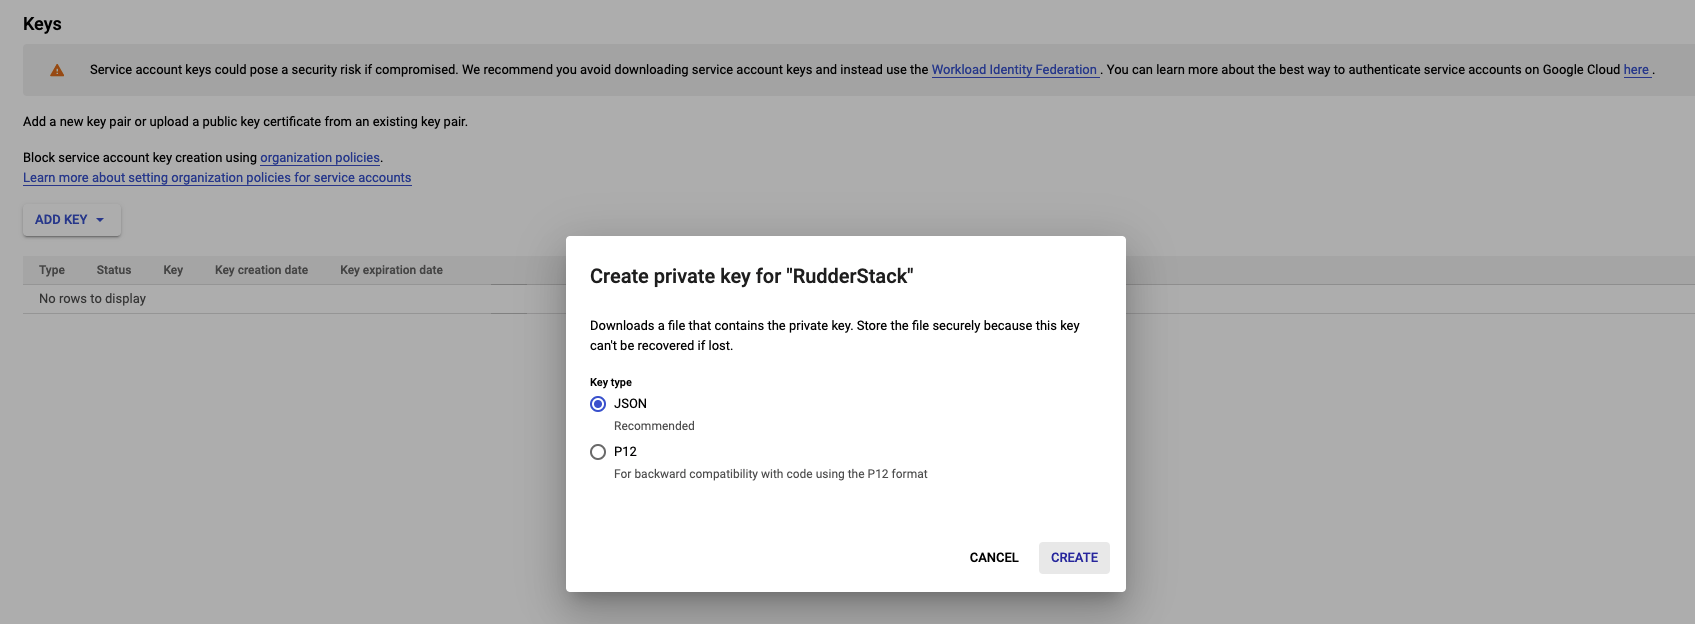
- In the resulting pop-up, select JSON and click on CREATE.
- Finally, download this JSON file. This file is required while creating a BigQuery warehouse source in RudderStack - the next section covers the steps to do this.
Creating the RudderStack schema and granting permissions
- The following command creates a dedicated schema
rudderstack_used by RudderStack for storing the state of each data sync.
create schema rudderstack_;- The following query allows the service account
Rudderstackto have full access to the schemarudderstack_(used by RudderStack).
GRANT `roles/bigquery.dataOwner` ON SCHEMA rudderstack_ TO "serviceAccount:<SERVICE_ACCOUNT_ID>";Setting up the source
To set up Google BigQuery as a source in RudderStack, follow these steps:
Log into your RudderStack dashboard.
From the left panel, select Sources. Then, click on New Source in the top right corner.
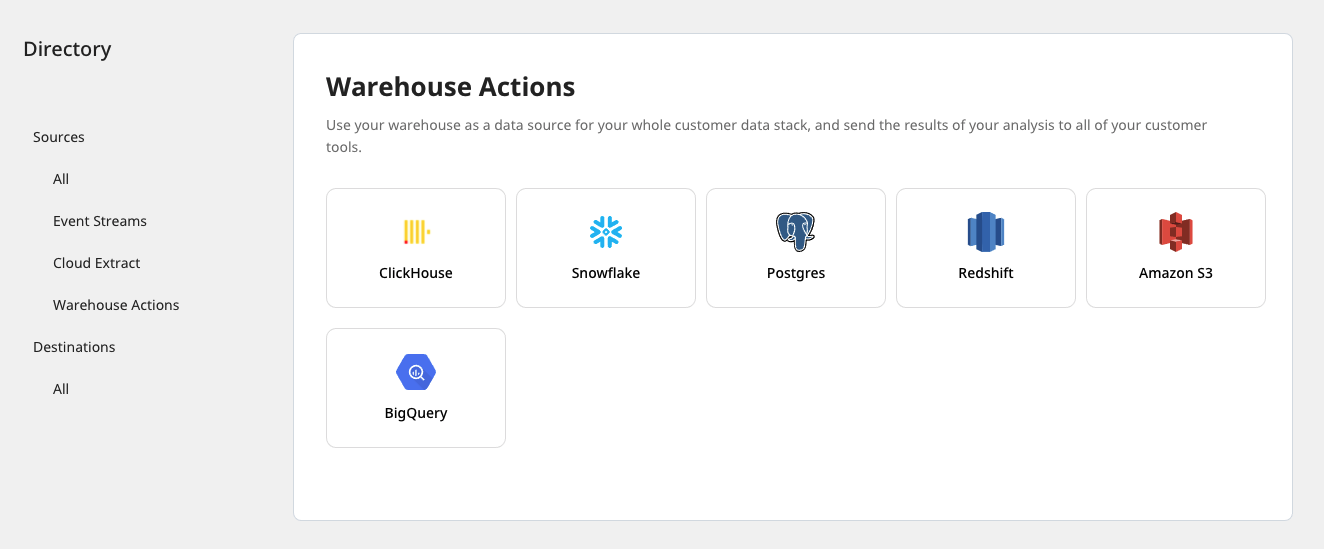
Click on Warehouse Sources and select BigQuery, as shown:
Setting up the connection
- Assign a name for your source and click on Create Credentials from Scratch.

If you have already configured Google BigQuery as a source before, the existing credentials will automatically appear under Use Existing Credentials.
- Next, enter the BigQuery Project. Also, paste the Credentials JSON obtained by following the Creating and downloading the JSON key section above. RudderStack will use this JSON to import the data from your BigQuery instance.

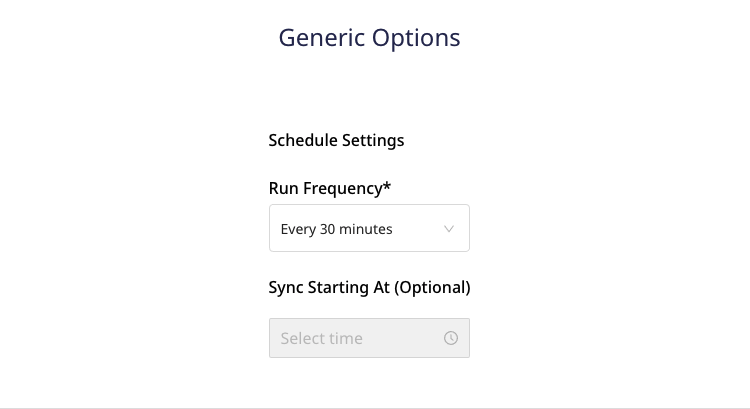
Setting the data update schedule
Next, you will be required to set the Run Frequency to schedule the data import from your BigQuery project to RudderStack.
Optionally, can also specify the time when you want this synchronization to start, by choosing the time under the Sync Starting At option. Then, click on Next.
That's it! BigQuery is now successfully configured as a source on your RudderStack dashboard.
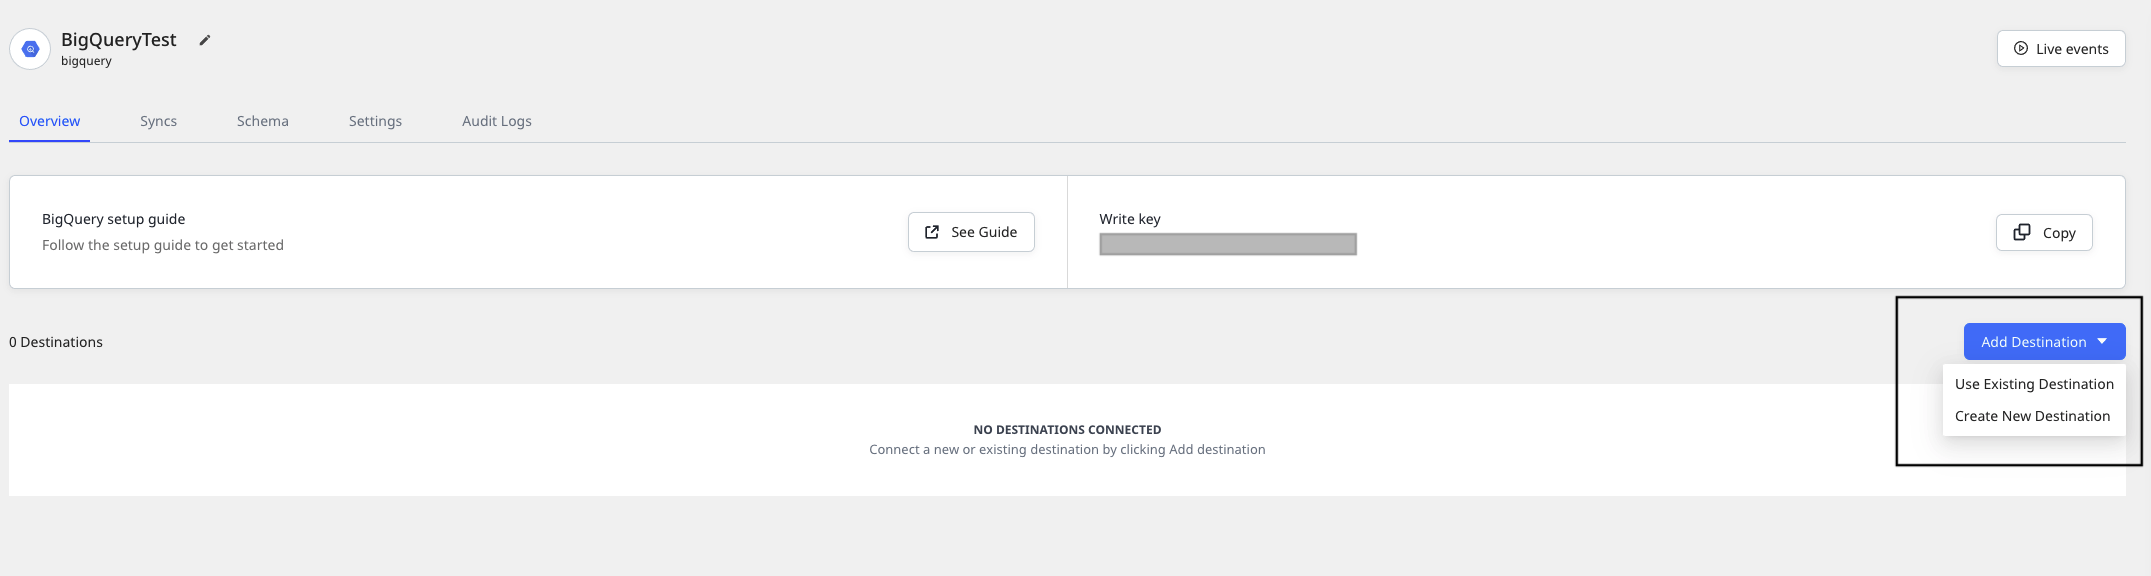
Specifying the data to import
Once you have set up the BigQuery source, you can connect it to an existing or new destination via the Add Destination button, as shown:
Then, follow these steps:
- Select the Schema and the Table from which you want RudderStack to import the data. You can also select the user identifiers (user_id/anonymous_id) from the dropdown list, as shown:
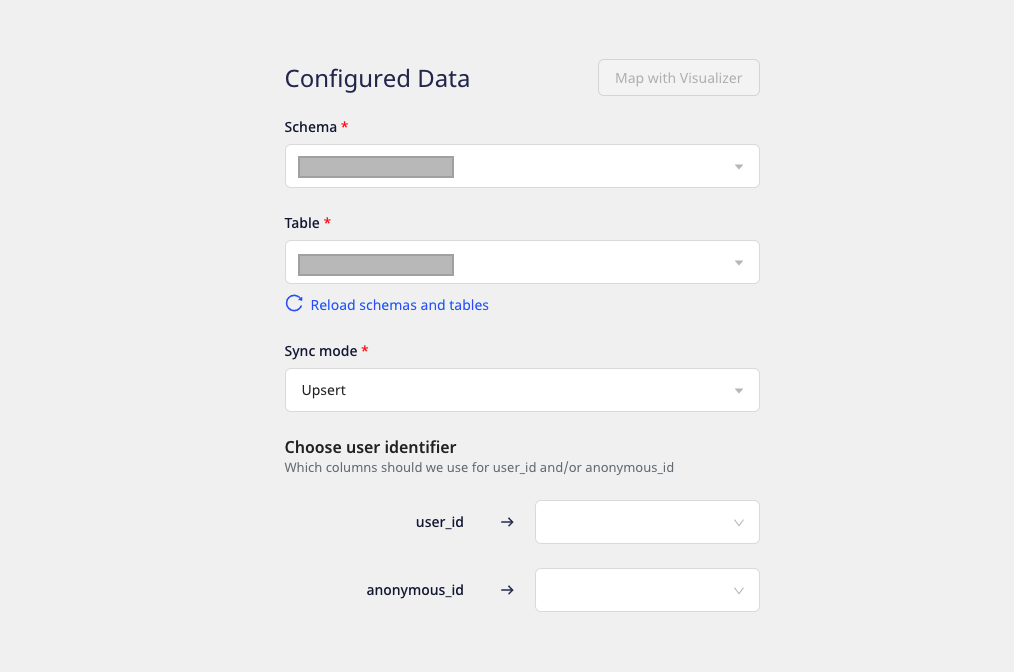
For HubSpot, Salesforce, Mailchimp, and Braze destinations, you can also use the Visual Data Mapper functionality to map your warehouse columns to specific destination fields.
- You can specify the table containing the required columns, you will be able to preview a snippet of your data. Here, you can search the columns by a specific keyword and select all or only specific columns of your choice. You can also edit the JSON Trait Key and preview the resultant JSON on the right, as shown:
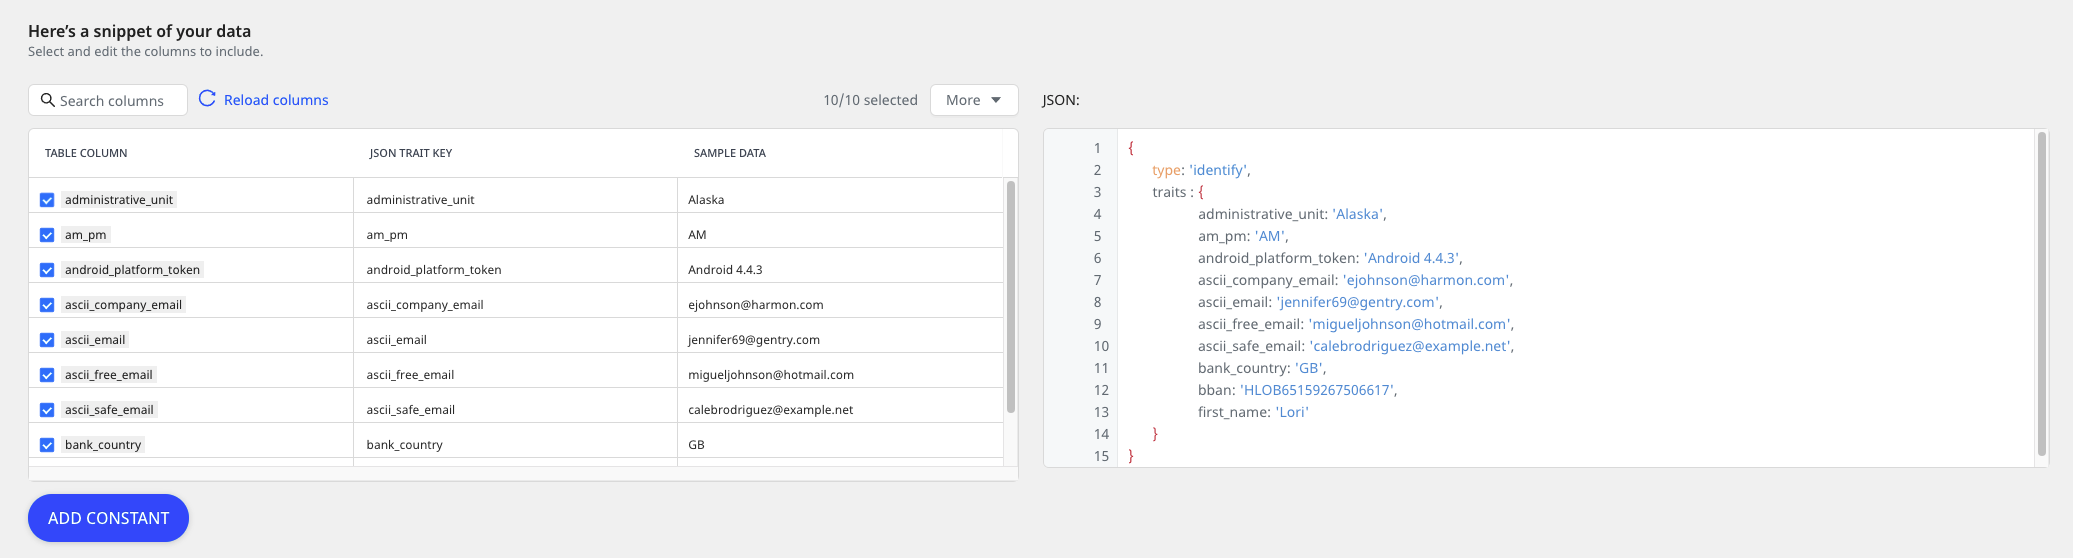
- Once you have selected the required table columns to import the data, click on the Save button on the top right side of the configuration window.
RudderStack will then start importing the data from your BigQuery table as per the specified frequency.
FAQs
What do the three validations under Verifying Credentials imply?
When setting up a Warehouse Actions source, once you proceed after entering the connection credentials, you will see the following three validations under the Verifying Credentials option:

These options are explained below:
- Verifying Connection: This option indicates that RudderStack is trying to connect to the warehouse with the information specified in the connection credentials.
If this option gives an error, it means that one or more fields specified in the connection credentials are incorrect. Verify your credentials in this case.
- Able to List Schema: This option checks if RudderStack is able to fetch all the schema details using the provided credentials.
- Able to Access RudderStack Schema: This option implies that RudderStack is able to access the
rudderstack_schema that you have created by successfully running all the commands in the User Permissions section.
If this option gives an error, verify if you have successfully created the rudderstack_ schema and given RudderStack the required permissions to access it. For more information, refer to this section.
Contact us
If you come across any issues while configuring BigQuery as a source on the RudderStack dashboard, you can contact us or start a conversation on our Slack channel.